


Tennis school tutorial
Managing groups and the schedule
Create the groups, assign the pupils and confirm the schedule
The registrations have been received: create your groups, assign the pupils, then add the lessons to the booking chart.
1Open the lesson's groups
Open Lessons, then Manage groups, expand the sport-season and click the lesson's tab. On the left, the Not assigned; on the right, one card per group with its day, time, court, coach and how full it is.
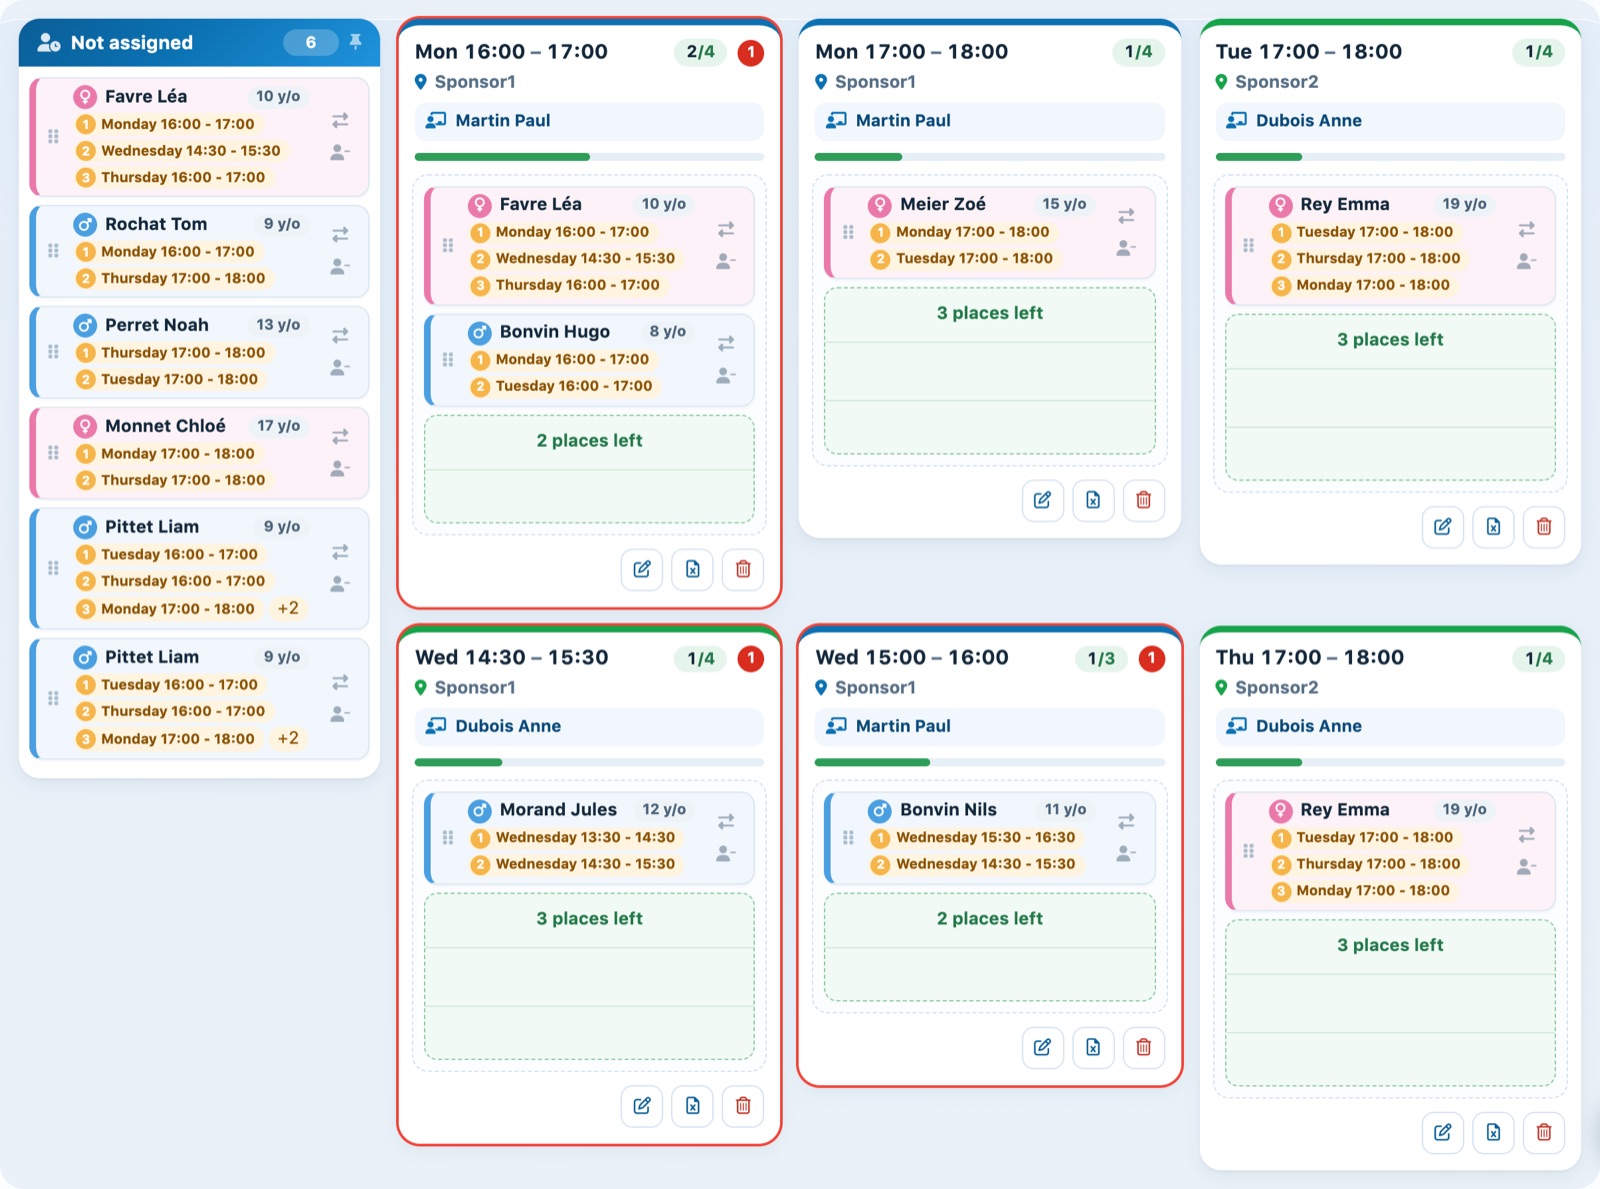
The tennis school's group board.
2Create a group
Click Add a group and fill in: Coach 1, Colour, Number of participants, Court, Days and Time. One colour per coach or per level makes the booking chart easier to read.
Last season's groups can be recreated in one go with Copy groups (see Copy last season's groups). The Week view then shows all the groups on a days × courts grid, where you move them with the mouse (see Prepare the weekly schedule).
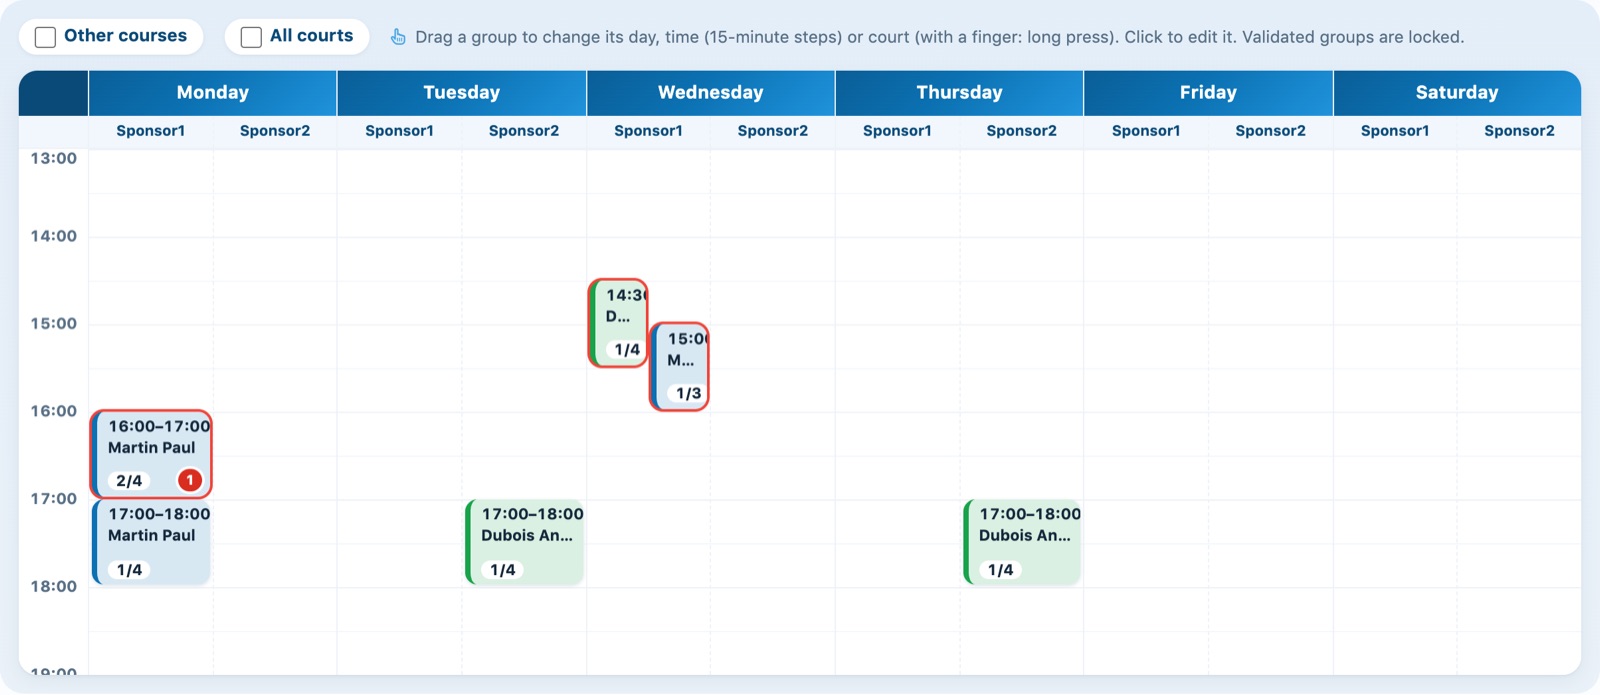
The Week view of the groups.
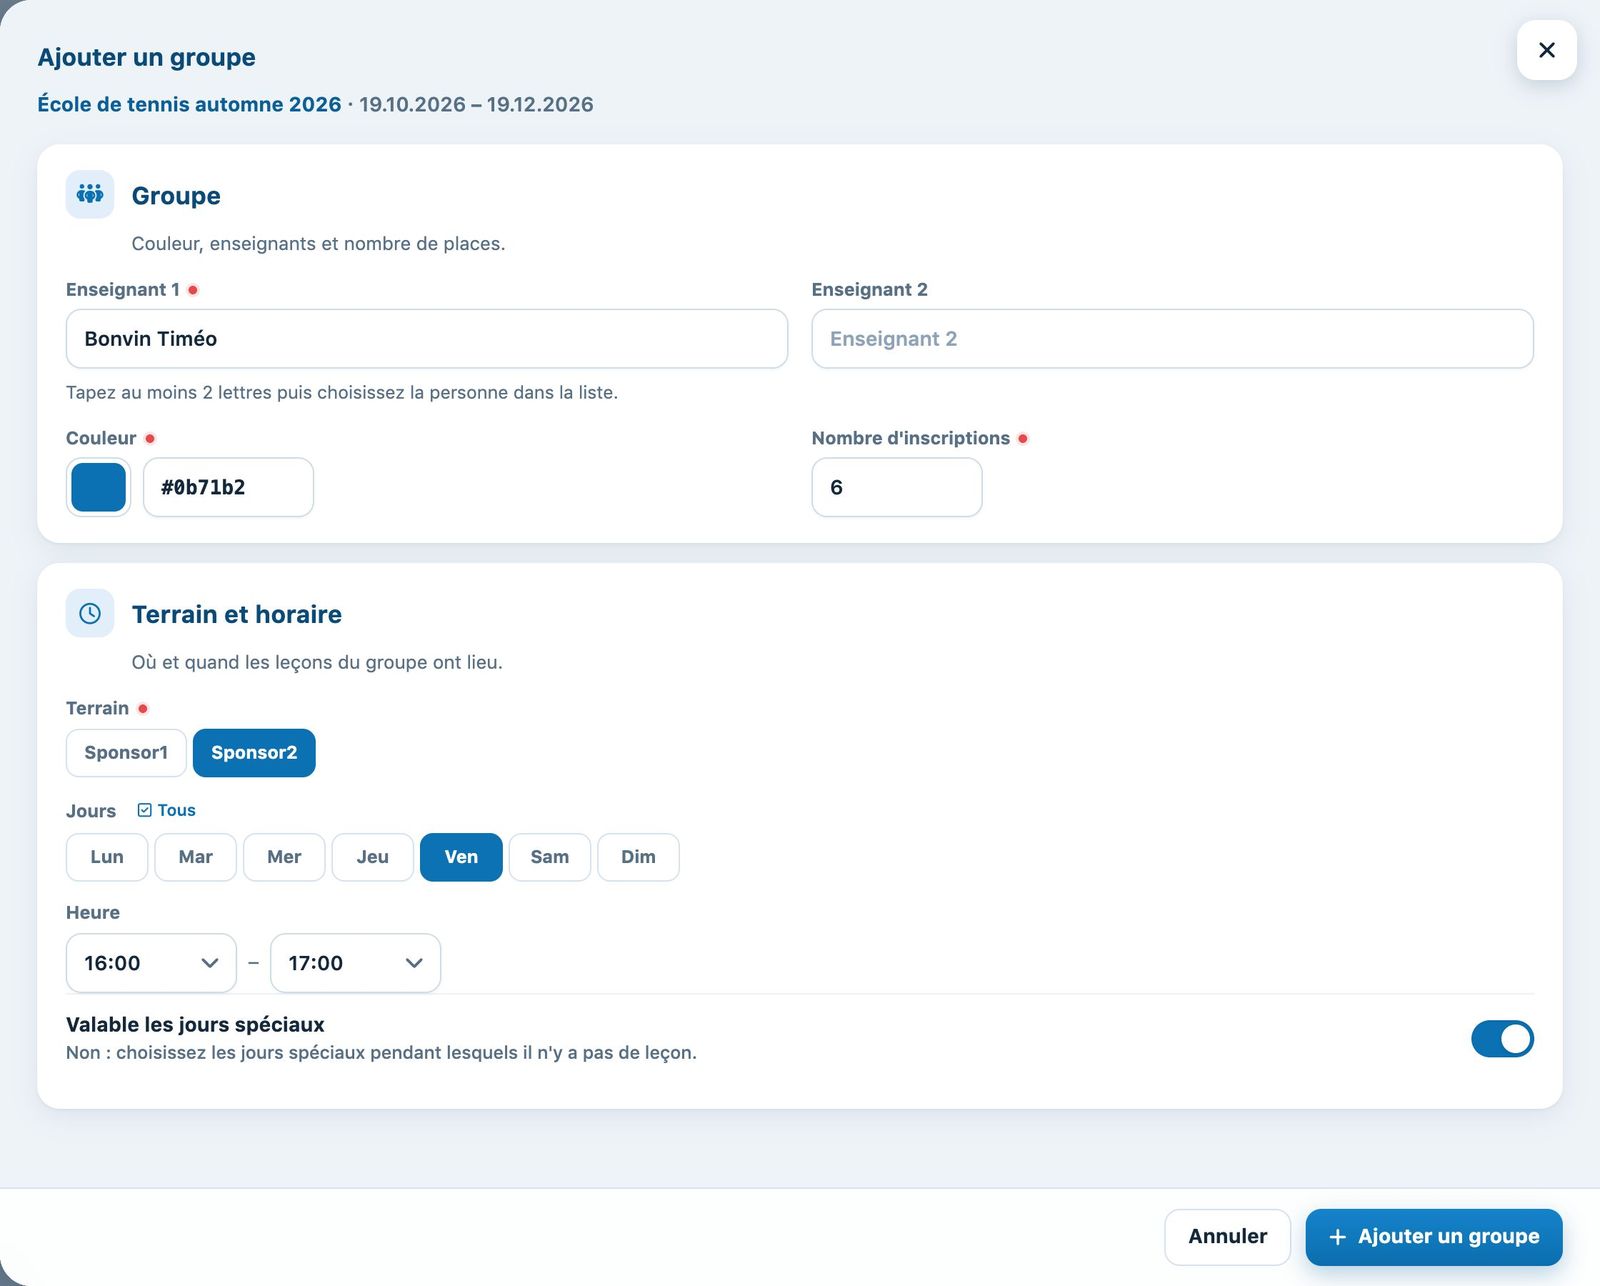
New group on Friday from 16:00 to 17:00.
3Assign the pupils
Drag each card by its handle to the desired group. The card shows the pupil's gender (blue or pink), age and preferences. A pupil registered 2x per week has two cards: place them in two different groups. While dragging, the groups that match their preferences light up in green.
To go faster, click Suggest a placement: Plugin.ch suggests a group for each unassigned pupil, based on their preferences and the remaining places; nothing is saved before Apply (see Place pupils automatically).
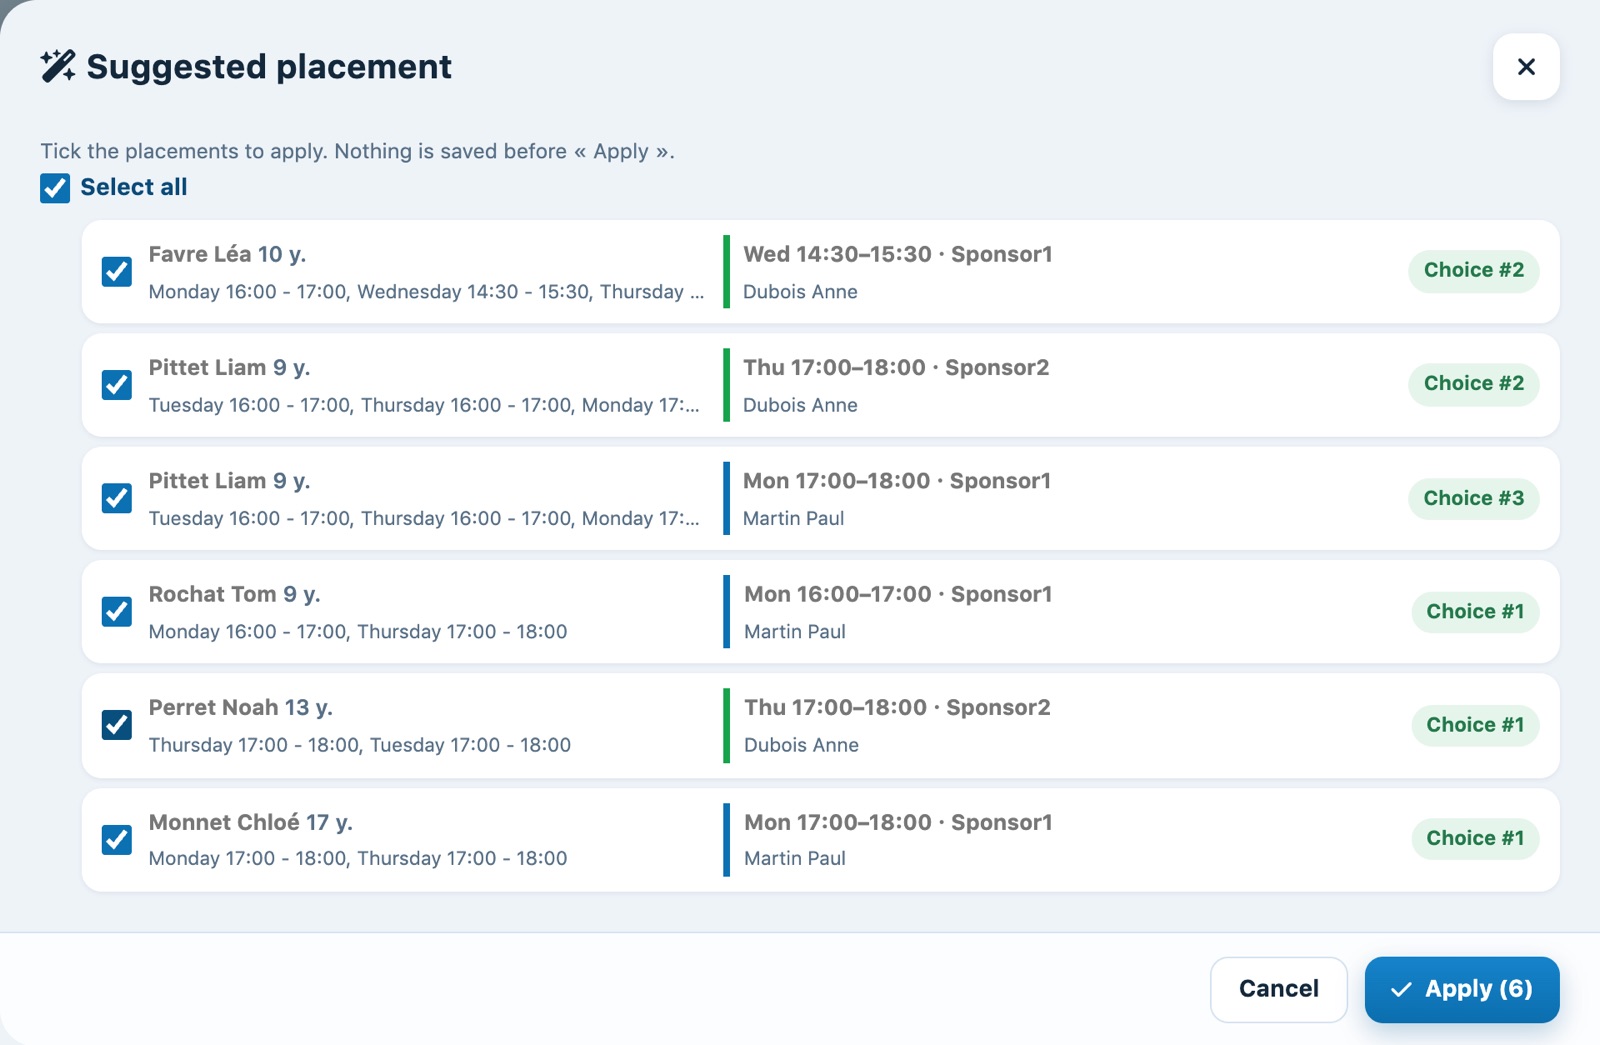
The suggested placement, to be applied line by line.
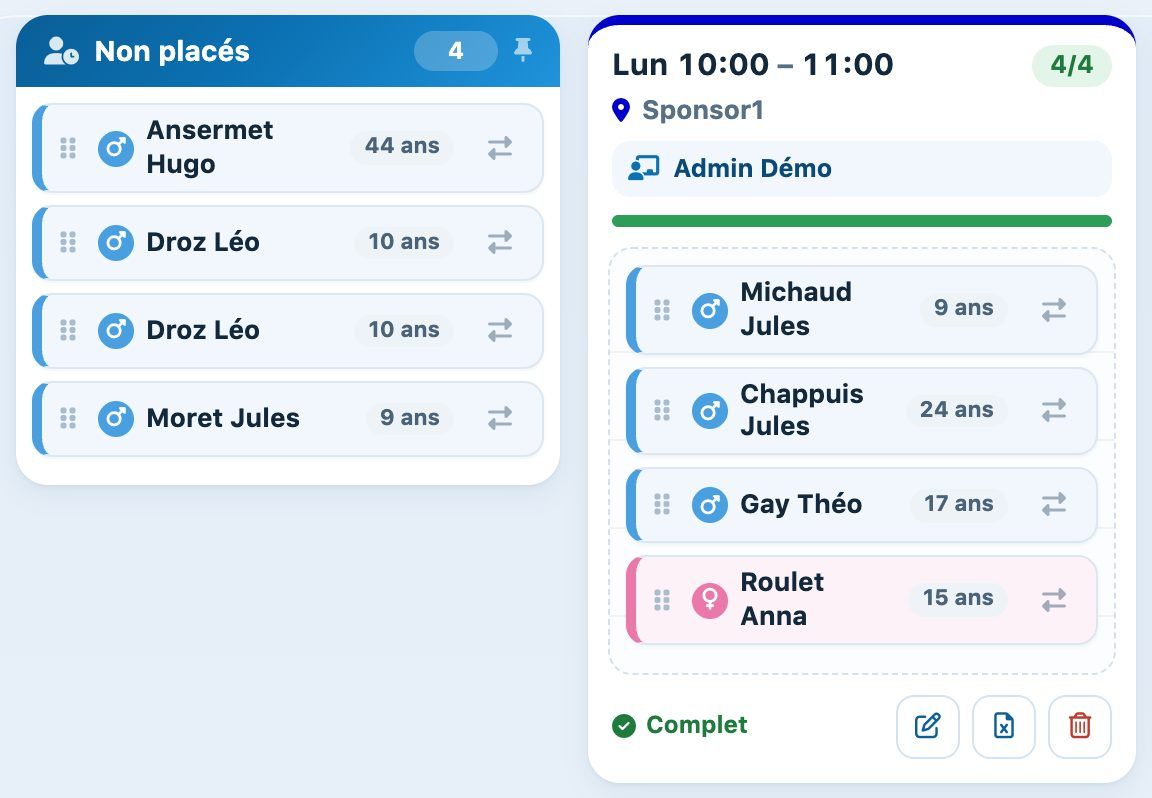
Dragging a pupil into a group.
Wrong day or court? As long as the group has not been confirmed, click the card's court, day or time to change them. The filters (day, Places left, Full) help you find a group.
A student stops or was placed by mistake? On their card, the Remove / unregister button (person icon with a minus sign, under the price change arrows) opens the Remove from the course panel. It first shows the effect on the invoice, then offers Remove from the group (the person goes back to Not assigned, enrollment and invoice unchanged) or Unregister from the course (the enrollment is deleted and invoicing adjusted).
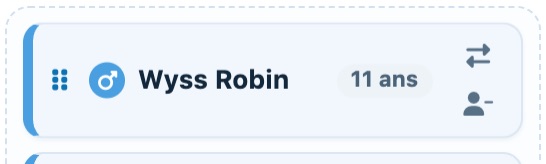
The “Remove / unregister” button on a student's card.
An unregistration that would change an already paid invoice is refused. All cases are described in Manage lesson groups.
4Confirm the lessons in the bookings
Click Confirm the lessons in the bookings and confirm. Each group's lessons are created on the booking chart for every week of the lesson; confirmed groups show a green calendar icon.
Beforehand, check the conflicts chip at the top right (court or coach double-booked, pupil placed twice at the same time, 2× per week pupil placed only once, overfilled group); court and coach conflicts are also listed in the confirmation. See Resolve scheduling conflicts.
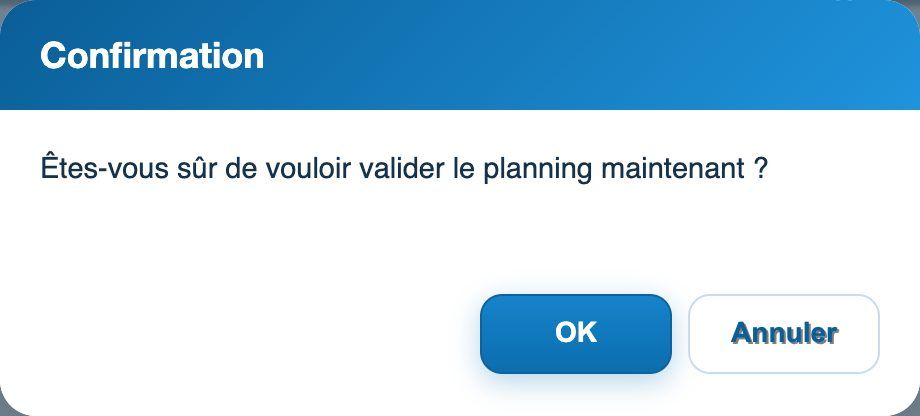
Confirmation prompt.
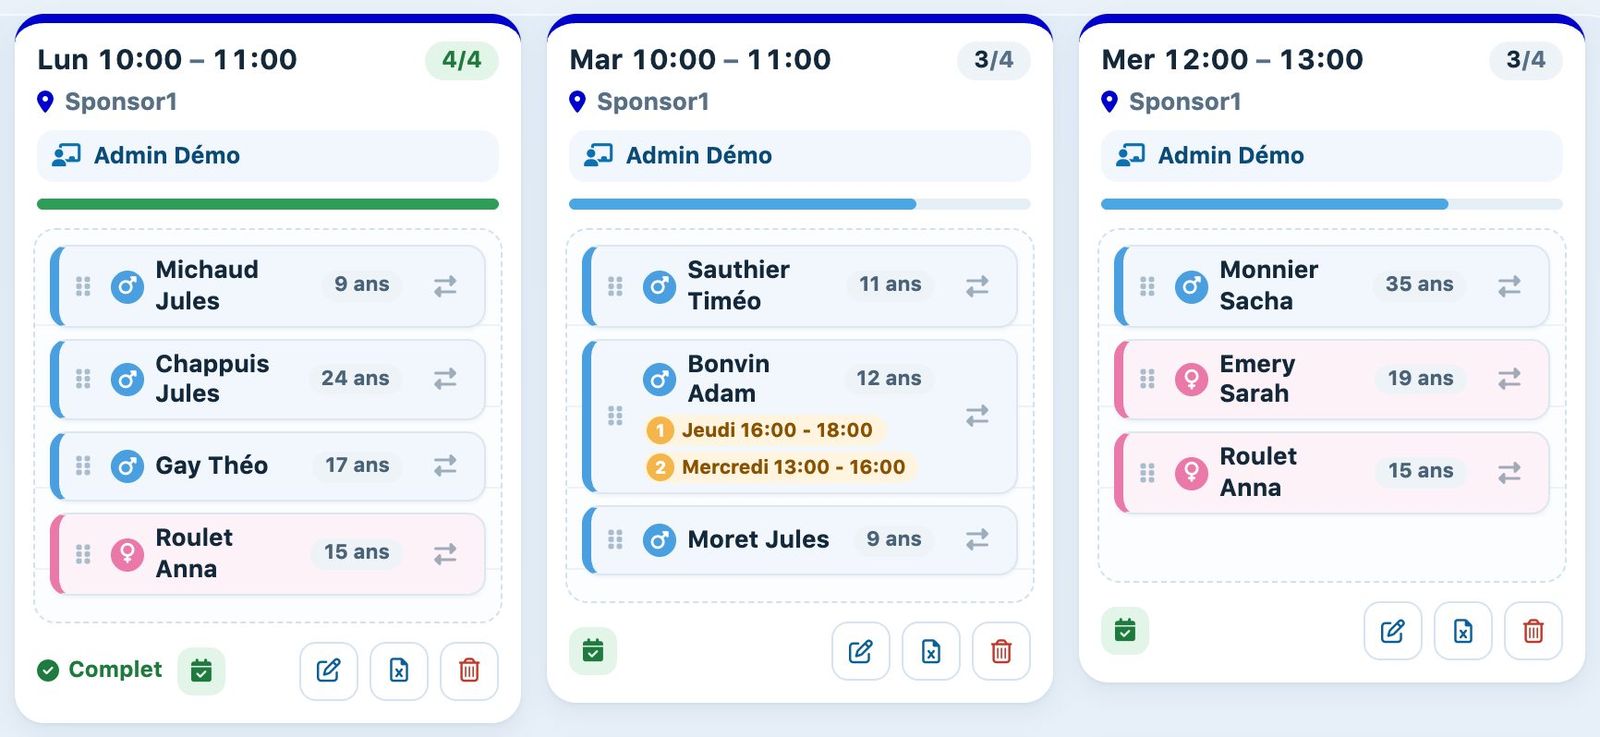
Confirmed groups.
5Cancel or make up a lesson
Open the group (pencil). In Group reservations, tick the cancelled lesson (public holiday, rain…) and click Delete selected reservations. To make it up, use Add lessons with the new date.
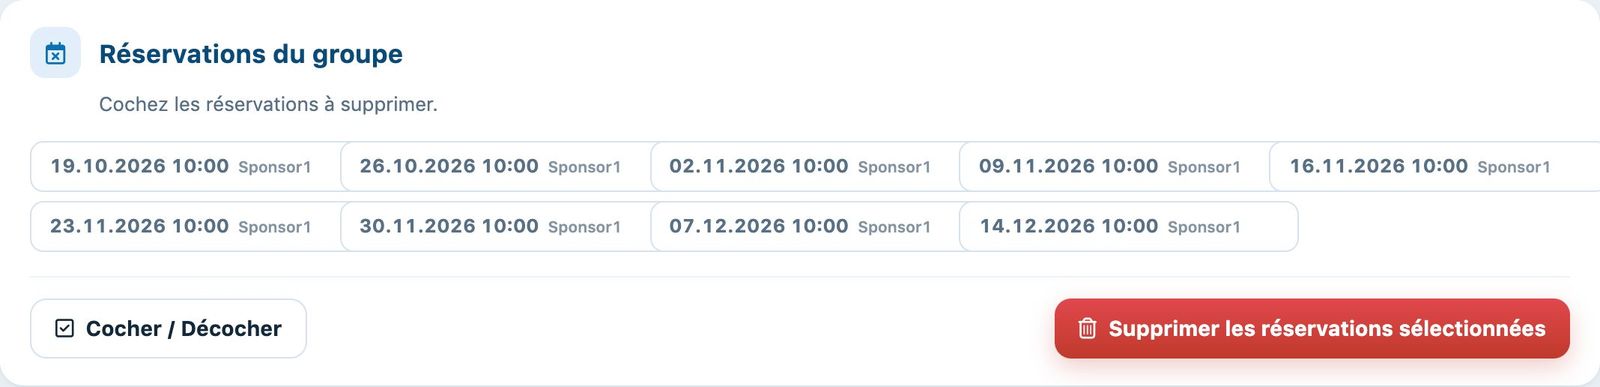
A group's lessons.
6Attendance on the chart
On the Reservations chart, each lesson shows the pupils, the coach and the lesson name. Click it to open the Presence panel and untick the absent pupils: each box is saved immediately. Attendance is used for "By presence" invoicing and for the Youth and Sport export.
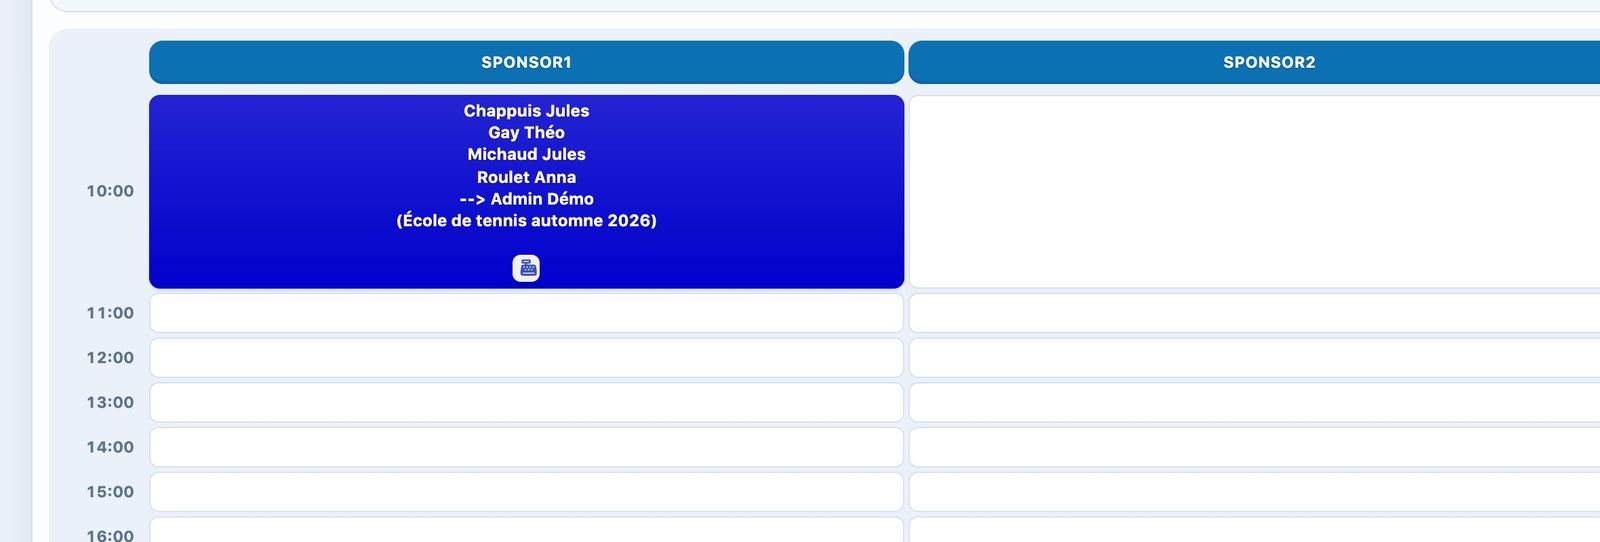
A lesson on the booking chart.
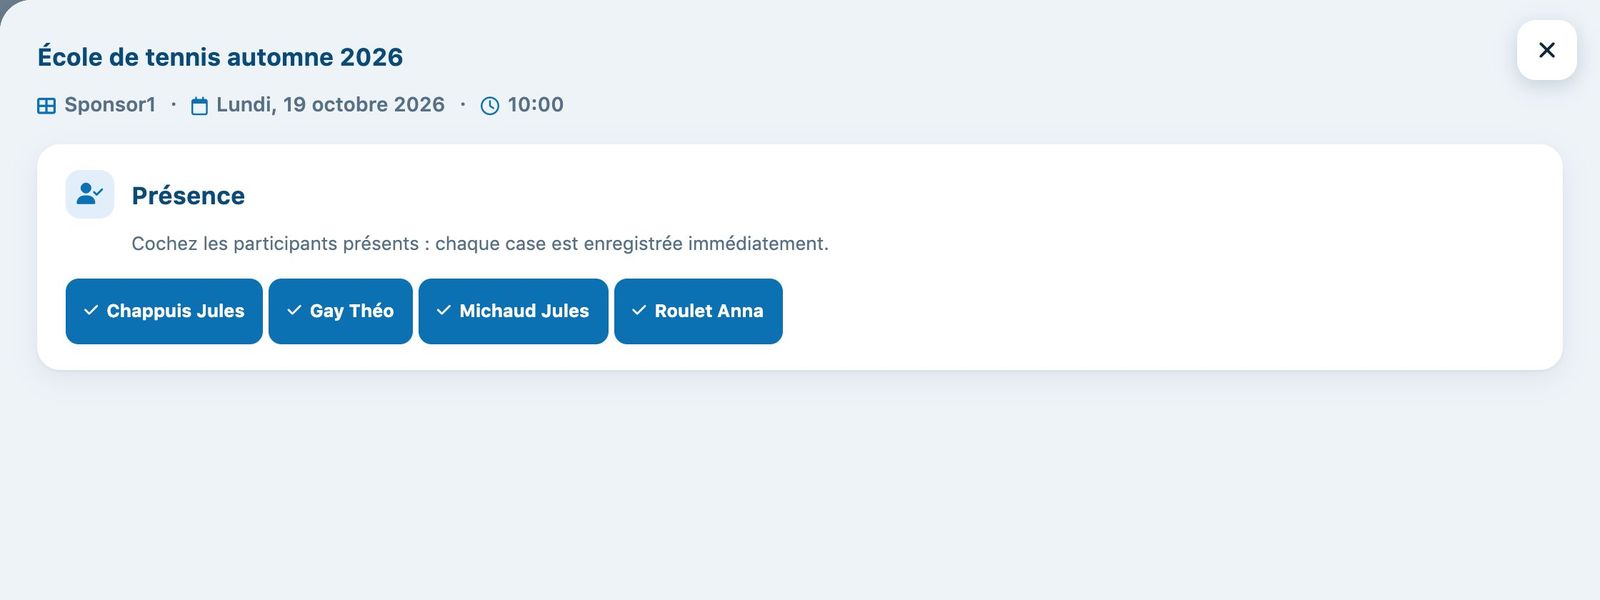
The Presence panel.
Plugin.ch tutorial — Tennis school tutorial