


Manage lessons
Manage lesson groups
Divide the pupils, prepare the schedule and create the bookings
Once the registrations have been received, the pupils are divided into groups: a group corresponds to a time slot (day, time, court) with one or two coaches and a number of places. The page offers three views: Board to place the pupils, Week to organise the courts and times, Coaches for each coach's workload and schedule.
1Open the groups of a lesson
In the side menu, open Lessons, then Manage groups. Expand the sport-season, then click the lesson's tab.
The top bar contains:
- the Board / Week / Coaches toggle (the chosen view is remembered on this computer) and, on the right, the conflicts chip (No conflicts or the number of conflicts);
- Confirm the lessons in the bookings, Add a group, Print as a PDF, Suggest a placement and Copy groups ;
- for a lesson For each session, the button Invoice people in groups; for a lesson By presence, Invoice according to presence ;
- Search a participant…: search by name; the filters All / Male / Female, by day, and Places left / Full refine the display;
- the counters: registered, not assigned and groups.
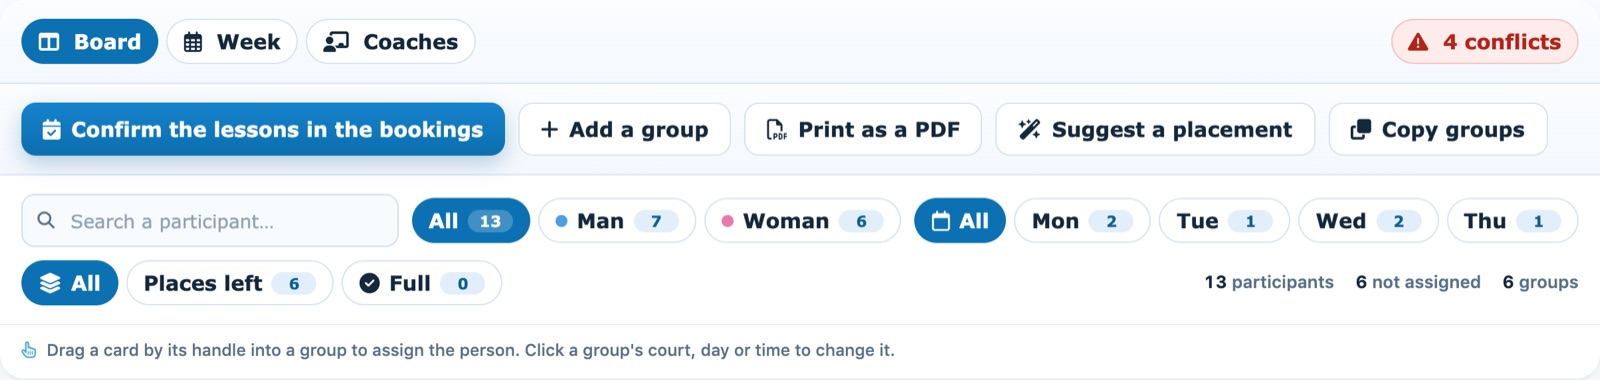
The views bar, the conflicts chip, the buttons and the filters.
The Week and Coaches views, the conflicts, automatic placement and copying groups each have their own article: Prepare the weekly schedule, Resolve scheduling conflicts, Place pupils automatically, Copy last season's groups and Send a coach their schedule.
2Create a group
Click Add a group. In the panel:
- Coach 1 (required) and Coach 2: type at least 2 letters then choose the person;
- Colour of the group on the booking chart and Number of participants (places);
- Court, Days and Time for start and end;
- Valid on special days: No to choose the special days (holidays, public holidays) without a lesson.
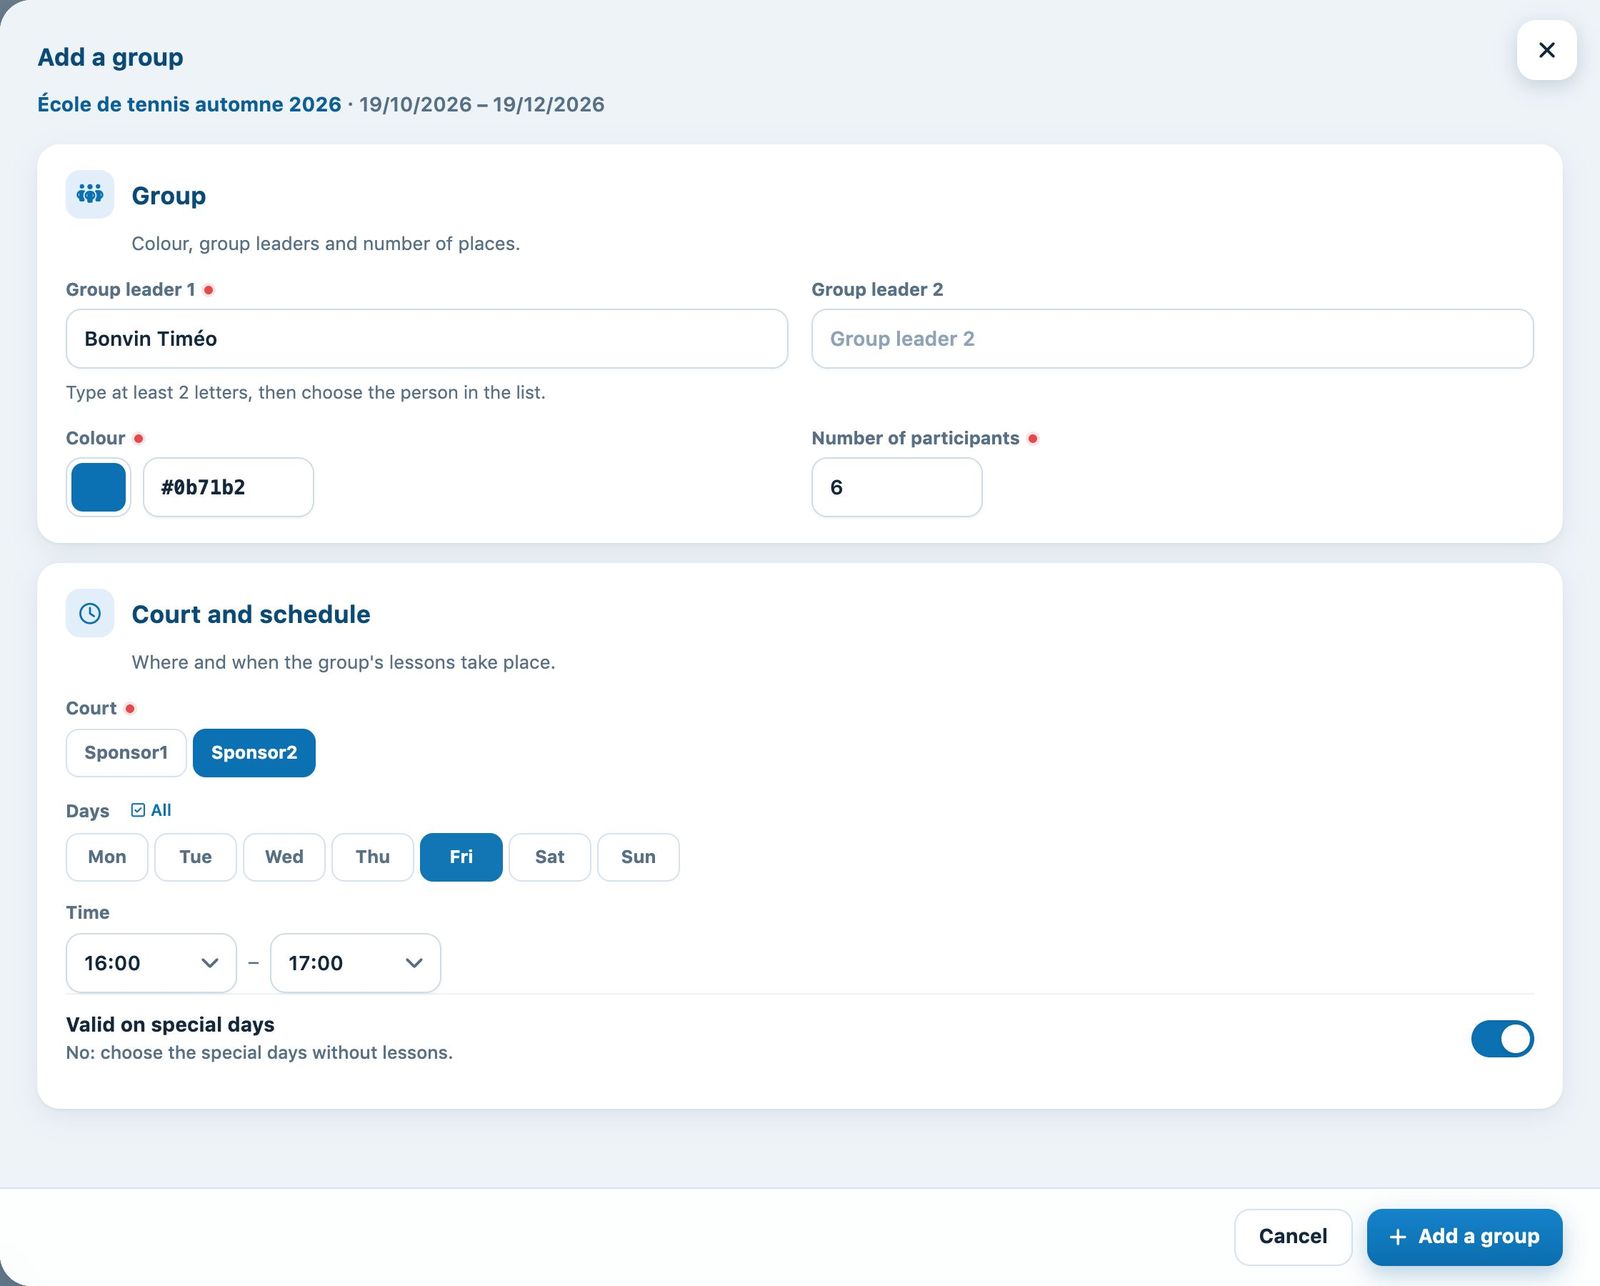
The "Add a group" panel.
If the chosen court shares its surface with another court (hybrid court, for example tennis and pickleball), the box Also block the linked courts appears, ticked by default: the lessons then also block the linked court. Untick it if this activity leaves the linked court free. The same box is in the panel Modify group.

The “Also block the linked courts” box, shown only for a linked court.
Click Add a group: the card appears on the board. As long as the group is not confirmed, clicking its court, its day or one of its times lets you change them directly; the Week view also lets you move it with the mouse.
New season? Rather than recreating each group, use Copy groups: see Copy last season's groups.
3Assign the pupils
Drag a pupil's card by its handle (the dots on the left) from the Not assigned list to a group. Each card shows the pupil's gender, age and preferences, numbered in the order in which they were chosen; beyond 3, a "+2" button expands them. Hovering over the card shows the chosen rate and the answers to the questions. The gauge and the counter (e.g. 3/4) show how full the group is; a full group is marked Full.
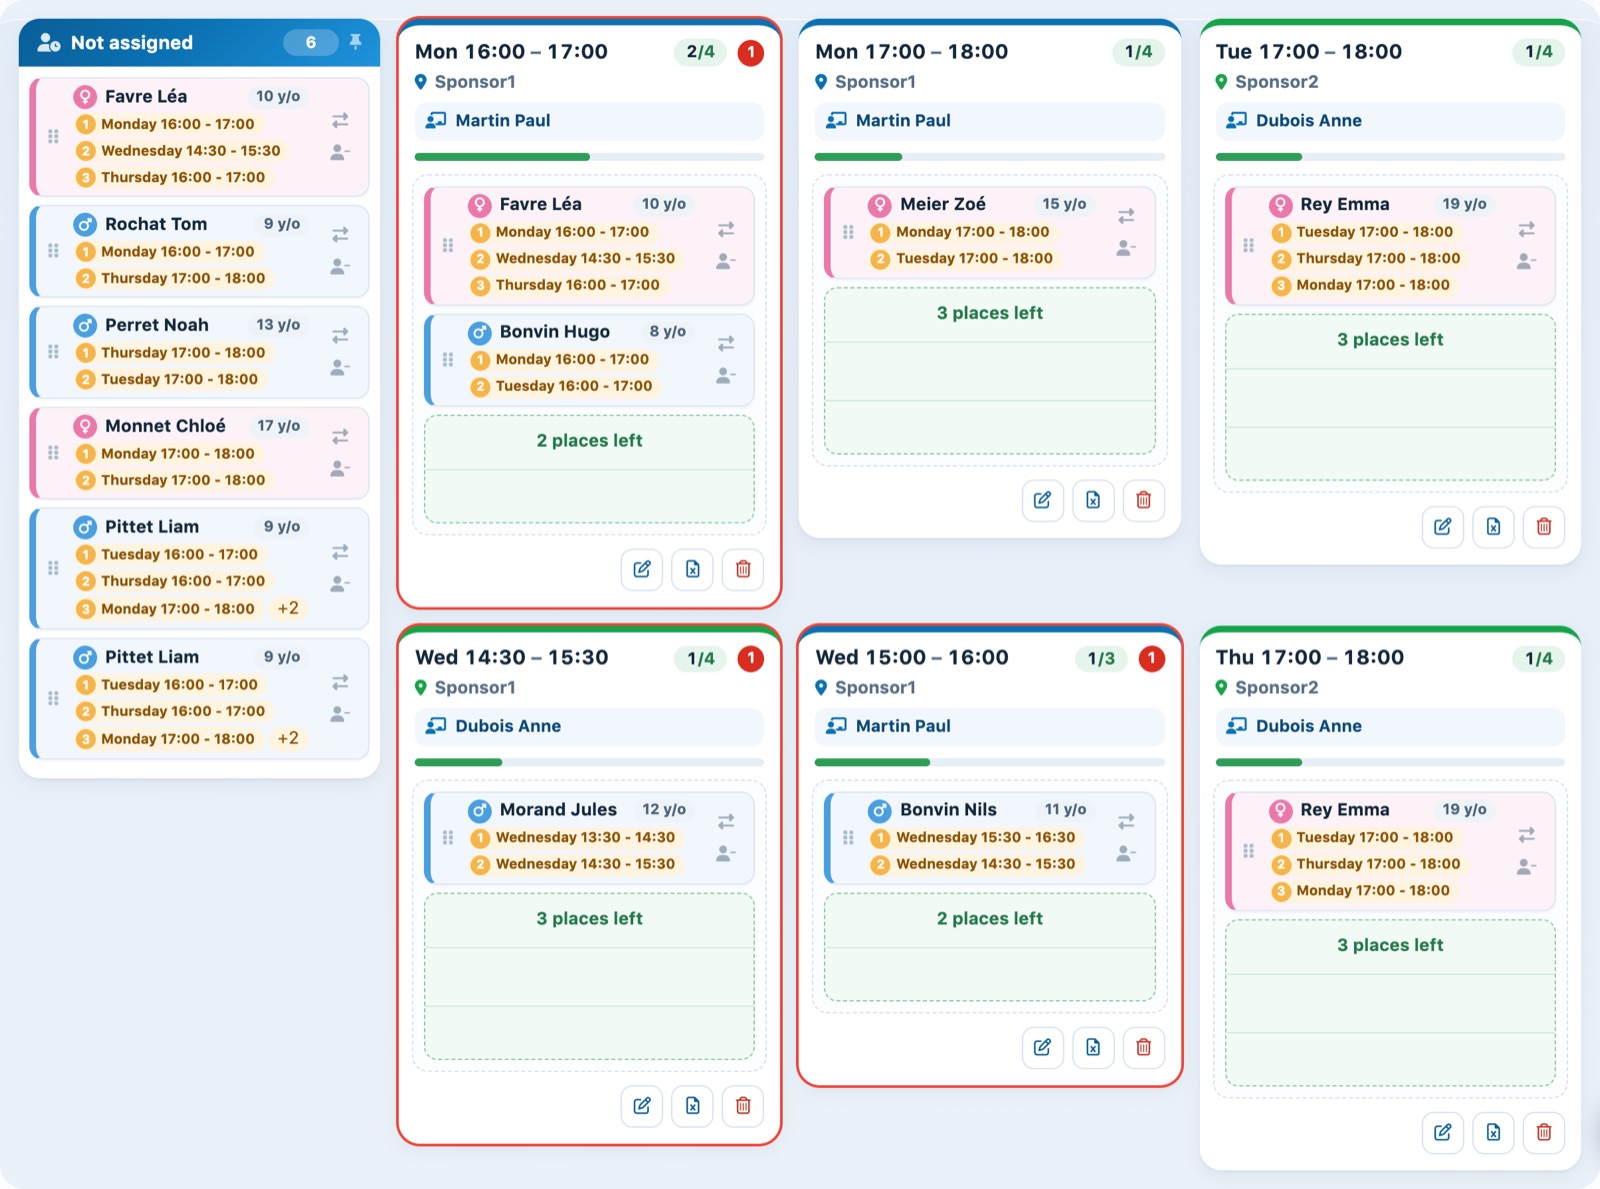
The board: unassigned pupils on the left, one card per group; the red dot flags a conflict.
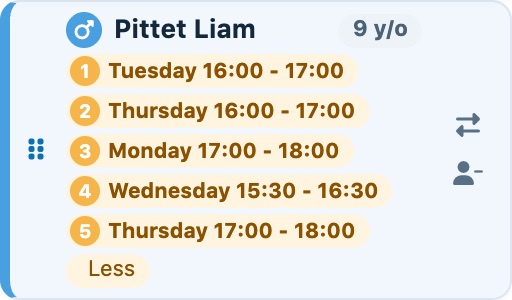
A pupil card with its five preferences expanded.
While dragging, the groups that match the pupil's preferences light up in green and the others fade: you can see straight away where to place them.
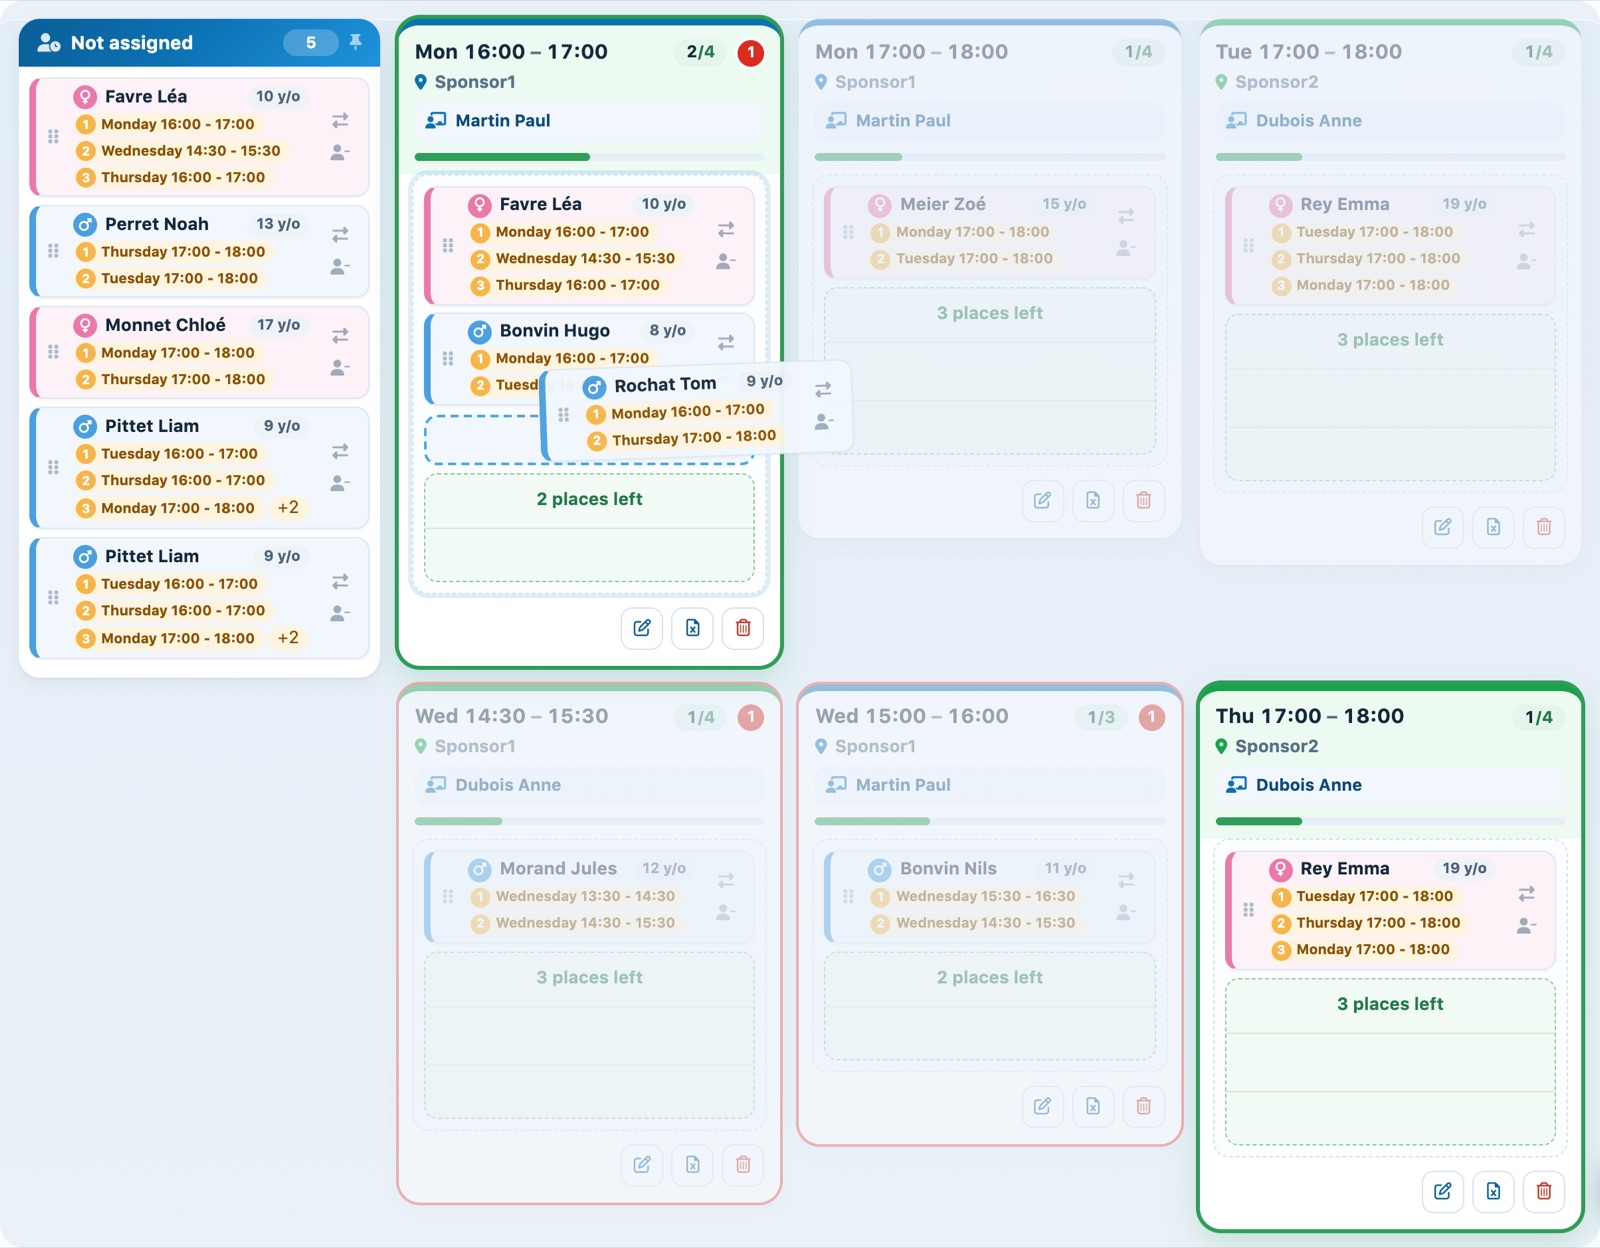
Guided placement: for this pupil (Monday 16:00 or Thursday 17:00), two groups are green.
Pupil registered twice a week: they appear with two cards, one per lesson: place each one in a different group. As long as only one is placed, a "Lessons" conflict reminds you. With many groups, click the header Not assigned to keep the list on the left of the screen while scrolling.
4Remove a pupil from a group or unregister them
On each student card, two buttons are stacked on the right: the arrows change the rate (see Change the rate of a registration), the person icon with a minus sign opens the panel Remove from the course.
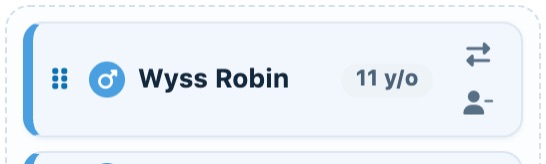
The “Remove / unregister” button below the rate-change arrows.
The panel shows the Lessons concerned and first states the effect on invoicing (no invoice, item to invoice deleted, line removed from an invoice to be resent…). Then choose:
- Remove from the group: the person goes back to Not assigned and leaves the group's sessions; the registration and invoice do not change;
- Unregister from the course: the registration is deleted, the person is removed from the sessions and invoicing is adjusted as announced.
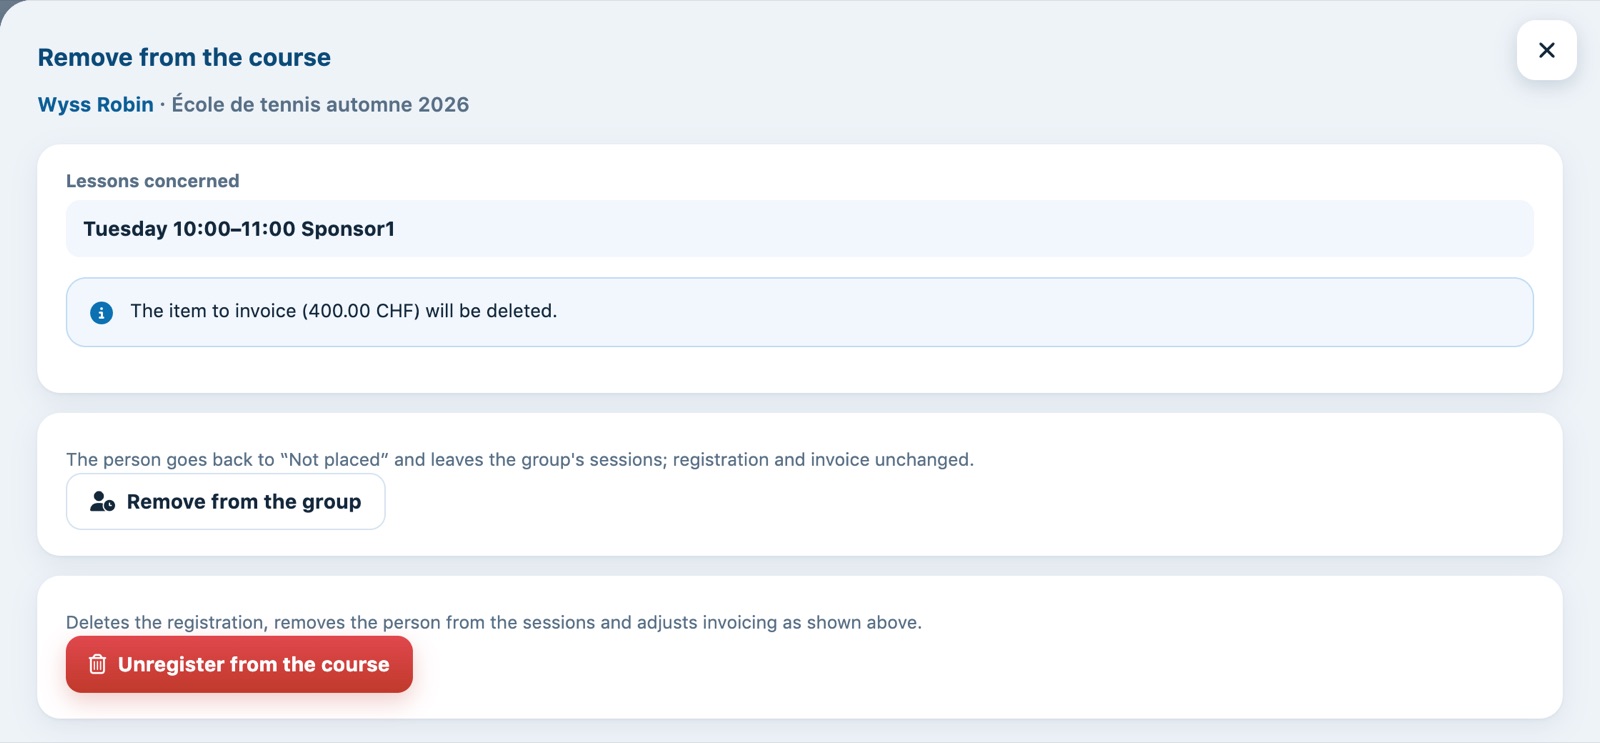
The "Remove from the course" panel: the effect on the invoice, then the two actions.
If unregistering would change an invoice that is already paid, it is refused: nothing would be refunded. The panel then shows “Cannot unregister here” and only Remove from the group remains available. Settle the refund or credit note with accounting first.
5Confirm the lessons in the bookings
When the assignment is ready, click Confirm the lessons in the bookings and confirm. Plugin.ch creates, for each group not yet confirmed, one booking per week on its court between the lesson dates (excluding the special days left out).
If a group to be confirmed has a court or coach conflict, the confirmation lists it first and asks "Create the bookings anyway?": click Cancel to fix it first (see Resolve scheduling conflicts).
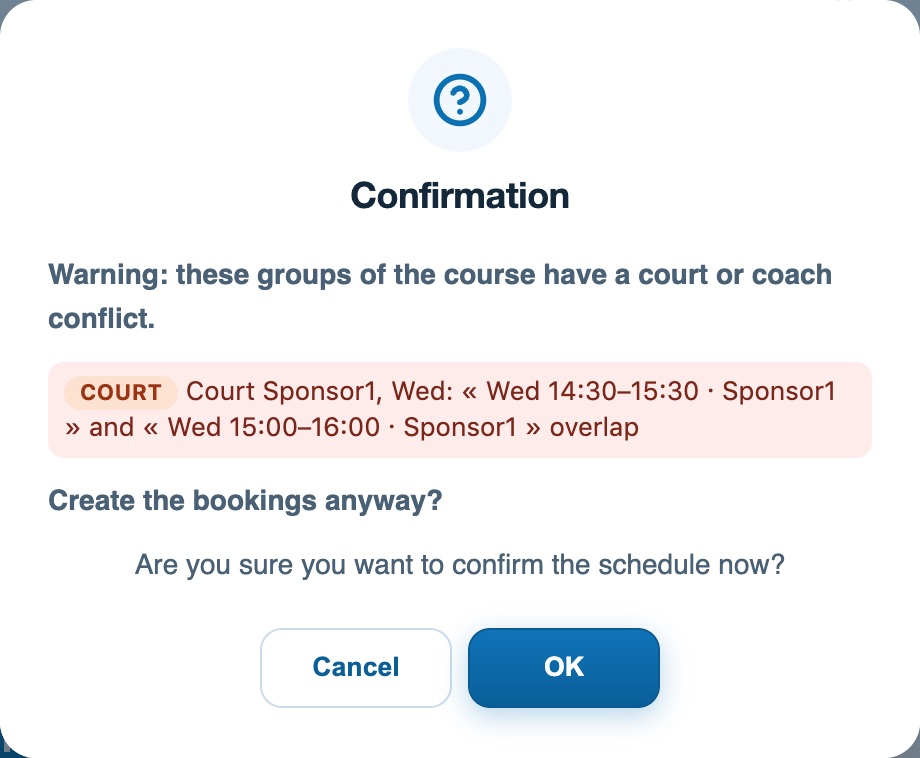
The confirmation dialog, with a court conflict flagged.
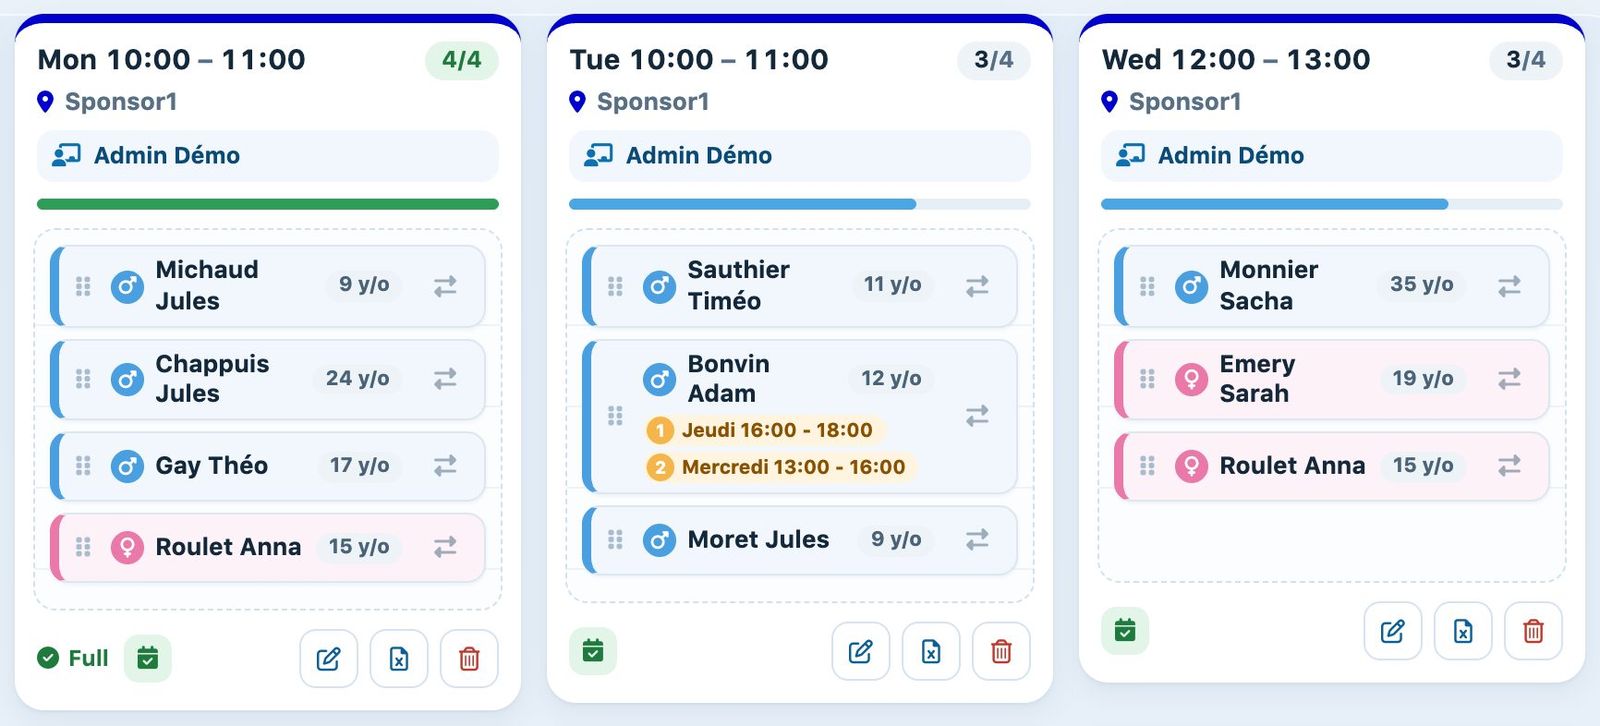
Confirmed groups show the green calendar icon.
A confirmed group shows a green calendar icon; its court, day and times can no longer be changed with a click, and it is locked in the Week view. If you then add a new group, click Confirm the lessons in the bookings again: only groups not yet confirmed are processed.
6Edit a group, add or delete lessons
Click the coach's name or the group's pencil icon (in the Week view: click the group). The Modify group panel has three parts:
- Group: coaches, colour and number of places, saved with Modify group ;
- Add lessons: court, dates, time and days, then Add lessons (for example to make up for a cancelled lesson);
- Group reservations: tick the lessons to remove (public holiday, bad weather…) then click Delete selected reservations ; Check / Uncheck selects everything.
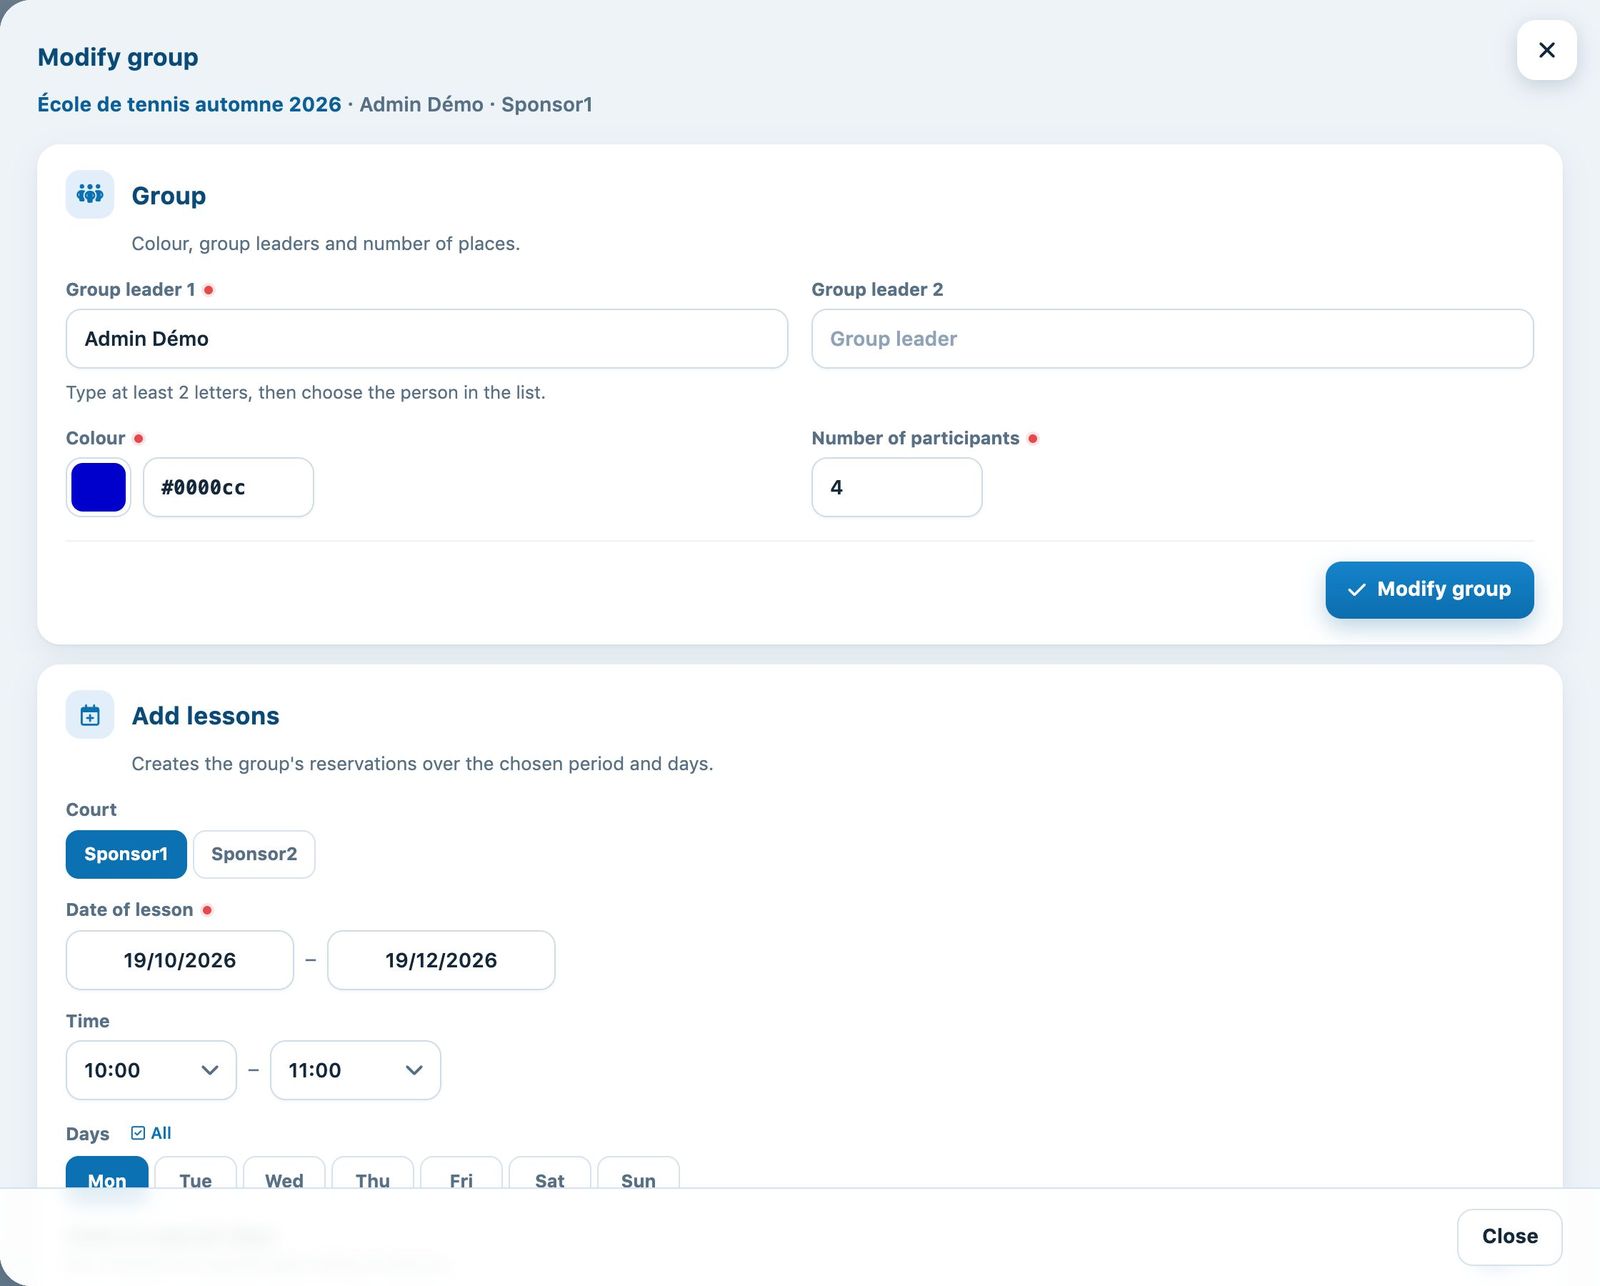
The "Modify group" panel.
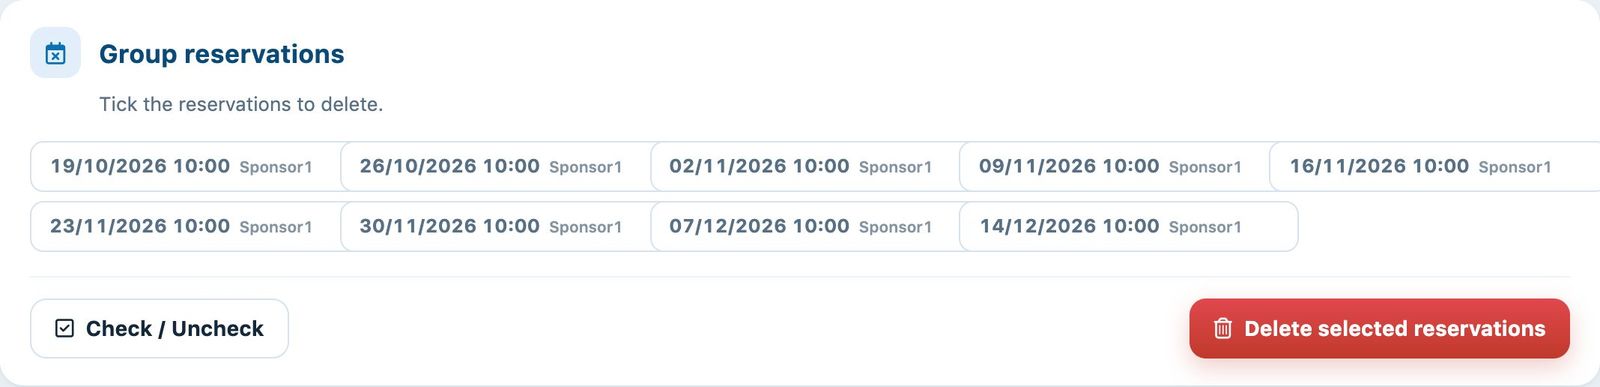
The group's lessons, to tick for deletion.
To delete a group, click its bin icon and confirm: its pupils go back to Not assigned.
7Attendance and lists
Confirmed lessons appear on the Reservations chart with the pupils, the coach and the lesson name. Click a lesson to open the Presence panel: untick an absent pupil, each box is saved immediately.
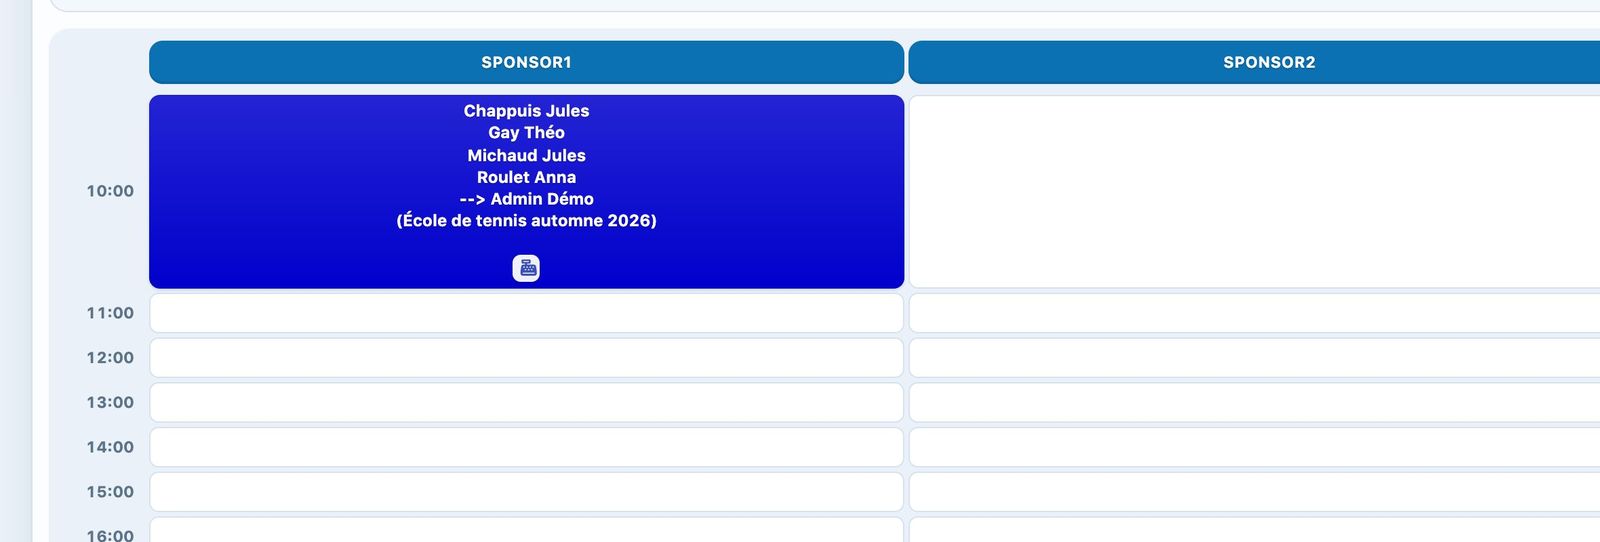
A group lesson on the booking chart.
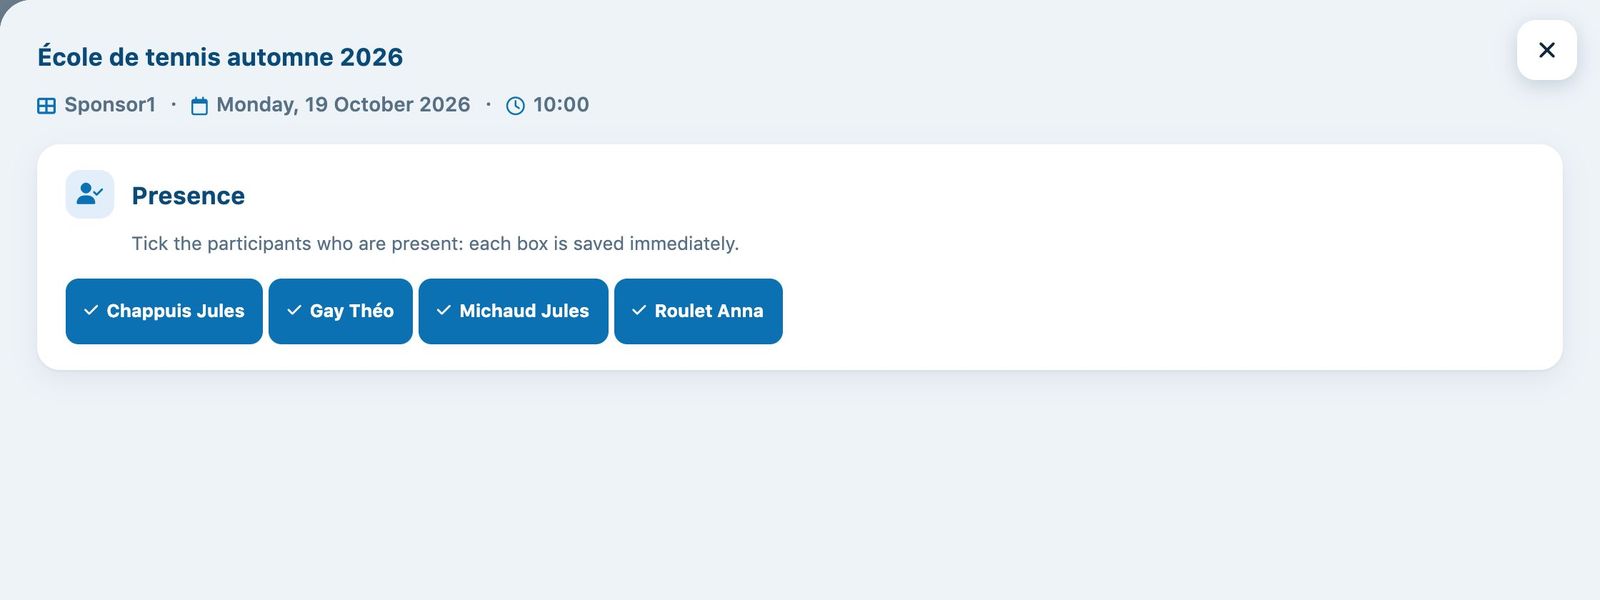
The Presence panel of a lesson.
Do not click Delete reservation to record an absence: the lesson would be deleted for the whole group.
On each group, the Excel icon downloads the Attendance list (Excel). Below the table, a summary lists each pupil with their day, time, court and coach (Copy, Excel, CSV, PDF buttons). Each coach's schedule can be shared from the Coaches: see Send a coach their schedule.
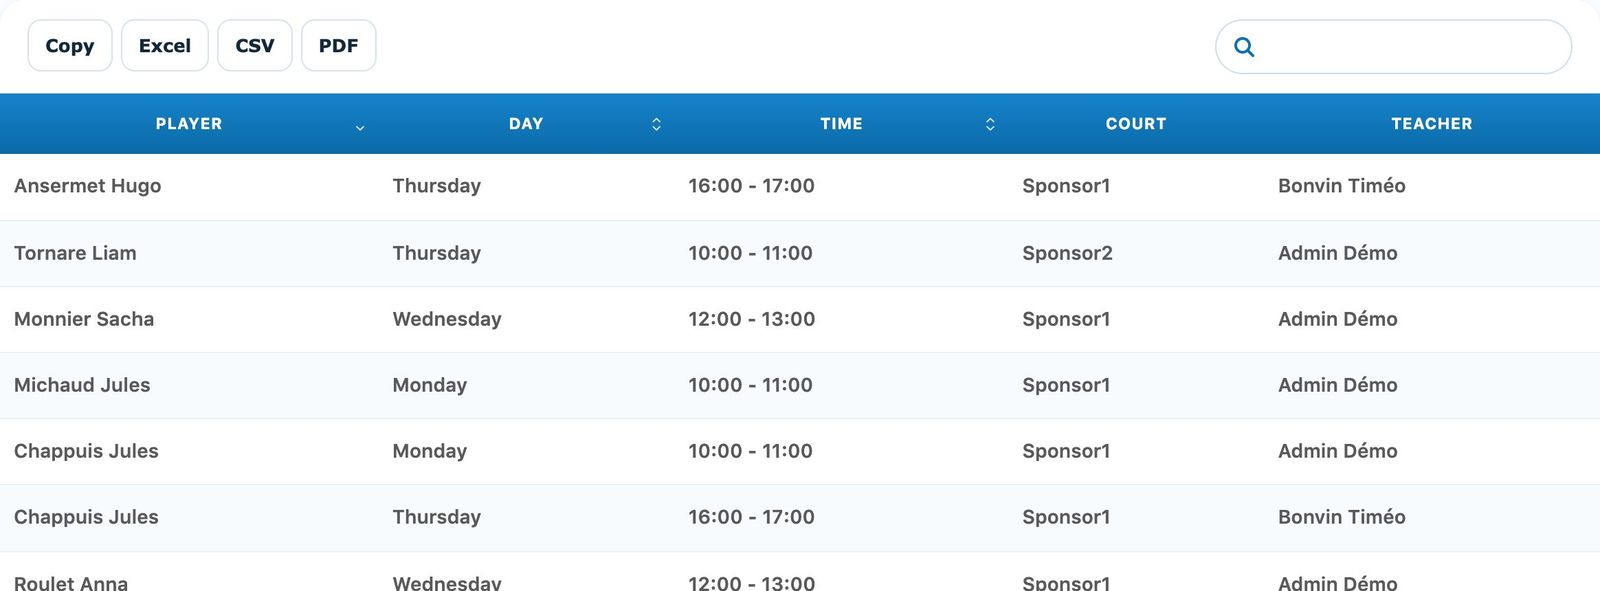
The summary below the board.
Plugin.ch tutorial — Manage lessons